How to Make Your Worksheets Digital
One of the biggest challenges is very easy to conquer. You can turning worksheets or PDFs into digitally-active worksheets.
If you’re using a PDF and need to make a copy of a page, do a screen capture of that page.
How to take a screen shot on a Mac:
- Press and hold these three keys together: Shift, Command, and 4.
- Drag the crosshair to select the area of the screen to capture.
- To take the screenshot, release your mouse or trackpad button.
- If you see a thumbnail in the corner of your screen, click it to edit the screenshot.
How to take a screen shot on a PC/Chromebook:
- Hit the Command, Shift and 3 keys together to take a screenshot of the entire screen.
- This screenshot will be automatically saved to your desktop.
Once you have your screen capture of the math page, it’s time to make it interactive. So, your next step is to open a new Google Slides and then, adjust it to a regular page setting.
- Use the File menu in Google Slides to choose “Page setup.”
- The default is “Widescreen 16:9.” Click on this setting to change the slide size.
- Change from widescreen to “Custom.”
- Change the slide page setting to 8.5 and 11 inches in size.
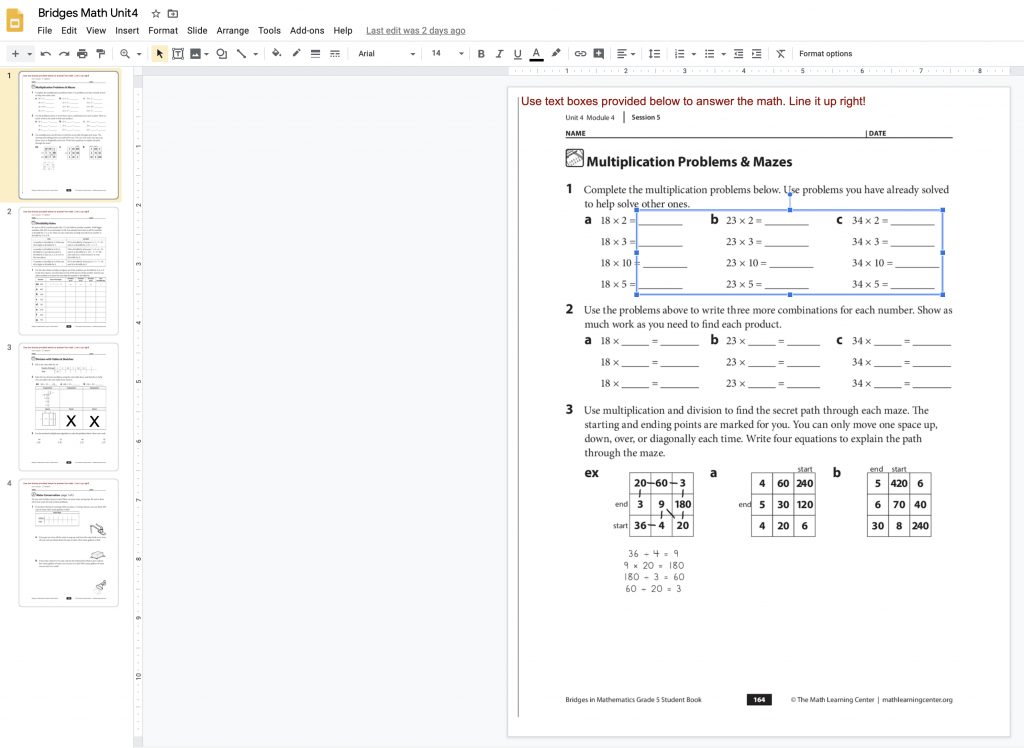
Now you have a page that’s set up for 8.5×11. Next, go to the menu and chose Slide>Change background. Click choose image and click upload. From here you can browse or you can drag the screenshot onto your slide. Typically the screenshot is on your desktop or the folder you download to.
Now the worksheet is the background for the slide. You can now create Text Boxes everywhere you want the students to write answers.

Keep your original Slide as view-only. When you’re assigning the worksheet to your students in Google Classroom, make so every student gets their own copy. That way every student will have their own worksheet to work on. When they’re done, have them turn it in.
I hope this is helpful! I’ll be adding more resources soon, so check back. Follow me on Twitter to stay updated @bobbiegrennier.
Stay healthy!
Bobbie
